

Overview
The intent of this first lesson is to create a new project, review project settings, activate sections, and activate paragraph and perform basic edits all while exploring the interface and options available during the editing process.
For your convenience, we've attached a PDF version of this article as well as a video that will walk you through the lesson's steps.
Creating a New Project
Follow the steps below to create a new project.
- From the Projects tab of the Dashboard, click the red Create New Project button located in the top left corner of the window.

The Create New Project window will appear. This window will provide step-by-step selections for you to make while creating your new project.
- Define your project type by selecting Active Project, starting with Master Content, using the RIB Master (USA). When these three selections are made, your screen will appear as below.
- Click the blue Next button to fill in your project information.
- Begin filling in your project information by creating a title for your Active Project: Enter the name of the new project here. For example, enter “Atlanta Office Building”.
- Select the project location: Choose the country from the list of available options. For example, choose “United States”.
- Select the project state: Choose the state from the list of available options. For example, choose “Georgia”.
- Select the project city: Choose the city from the list of available options. For example, choose “Atlanta”.
- Select the project type: Choose the appropriate type from the list of available options. For example, choose “Office or Business”.
- Select the work type: Choose the appropriate type from the list of available options. For example, choose “New Construction”.
- Select the estimated size of the project: Choose the appropriate size range from the list of available options. For example, choose “100,001 – 500,000”. Use the unit of measure toggle to set Imperial or Metric. (sq. ft. or m2).
- Select the estimated budget of the project: Choose the appropriate cost range from the list of available options. For example, choose “15,000,001 – 100,000,000”.
- Click the blue rectangular Finish button at the bottom of the Create New Project Window.

The Sections List will appear. Before diving into the specification sections, it’s a good idea to review the project settings in the Summary Info.
Review the Creating a New Project article and video for detailed information.
Review Project Settings
Follow the steps below to review and update project settings in the Summary Info tab.
- Click on the Summary Info tab.

The General Settings of the project will appear. Changes made in the Summary Info are automatically saved. - Review and update the accessible fields within the project info and project details. Update the “Project ID” to "ABC123-RIB".
- Review the Project Sharing/Privacy settings selecting each option and reviewing its definition. Set this quick start project to “Hidden” so that only the System Managers in your organization will be able to access it without being granted access.
- Review the options and display preferences within the References, Section ID, Unit of Measure, and Date / Time Format settings. Confirm the Section ID setting is "999999".
Review the Summary Info article for detailed information.
Activating Sections
Follow the steps below to walk through 3 methods of activating specification sections into the project.
- Click the Sections tab.

- From the Sections list, access Division 08 – Openings.

- Within Division 08 – Openings, locate and access Subdivision 081000 – Doors and Frames.

- Within Subdivision 081000 – Doors and Frames, locate and click the checkbox next to the name of the Section 081113 – RIB – Hollow Metal Doors and Frames. This activates that section within your project but does not access the section.
- Click the name of the Section 081116 – RIB – Aluminum Doors and Frames.
- Click on the sequence number of the section title "0000" to activate the section into the project.

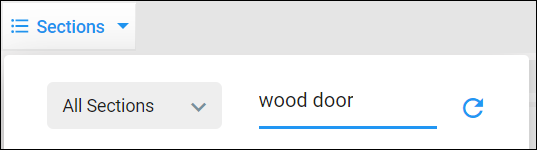
- Select the Sections menu located in the top left corner of the SpecLink Cloud Toolbar.

- In the Sections Pull Down List, type “wood door” into the Search Sections field.
- Under All Sections, activate Section 081416 – RIB – Flush Wood Doors by clicking the check box located to the left of the section number. A check mark will appear in the box.
The section is now active in the project.
For more detailed information, review the Viewing & Activating Sections video.
Activating and Editing Paragraphs
- Click the Sections toolbar icon to close the Sections menu. The Aluminum Doors and Frames section is active and open in the editing window.
- Select sequence numbers 0002, 0003, 0004, and 0005, to activate these paragraphs. For more detailed information, review the Activating Paragraphs article and video.
- Click within the paragraph text of Sequence number 0004 – “Flush aluminum doors with aluminum face sheets”.
- Right-click to reveal a menu of options. From this menu select “Decrease Indent”.
Notice that the paragraph level has changed and has now become “1.02 Flush aluminum doors with aluminum face sheets”.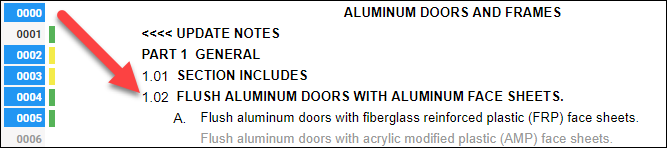
- Click the undo button or use the keyboard shortcut Ctrl-Z to undo this change.
- Click in paragraph 0004 “A. Flush aluminum doors with aluminum face sheets” between “aluminum” and “doors”.

- Type “and vinyl” to modify the paragraph. This will invoke the M* next to the sequence number, in the “O” (Origin) column indicating this is a Master paragraph and the asterisk indicates that it has been modified.

- Click the M* to retain the master paragraph by hiding the user modifications. Doing so also removes the asterisk from the origin column.

- Click the M again to view the user edits.

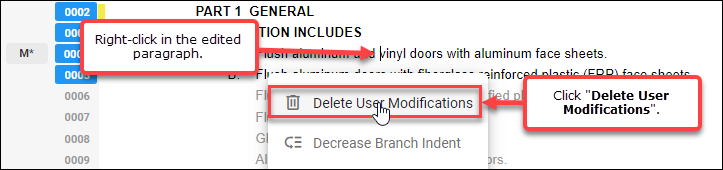
- Place the cursor on the paragraph and right-click bringing up a selection menu to remove the user modifications. From the menu, select Delete User Modifications.
- Place your cursor at the beginning of paragraph B. Press enter to create a new paragraph, moving the existing paragraph down one sequence number.

- Remove the new user paragraph if necessary, by right-clicking the newly created paragraph and selecting Delete User Paragraphs from the menu.
For more detailed information review the Basic Editing article and video.
Quick Start Lesson #1 Video
Please review the video below to watch the steps of this lesson live in action.
Review
With this lesson, you were able to create a new project and activate sections, as well as activate and edit paragraphs all while investigating the interface and options available during the editing process.
For more information on the content covered in this lesson please review the following articles:
Review our online training events schedule.
As always, our support team is available every weekday to address your questions.
Call us at (800) 266-7732 or email us at support.usa@rib-software.com.
Comments
0 comments
Article is closed for comments.